DATE AND TIME: Class - 9-11am, Friday 10/3/14
LOCATION: Chemistry Lab
SUBJECT: Sandcasting - Wax Medallion Carving
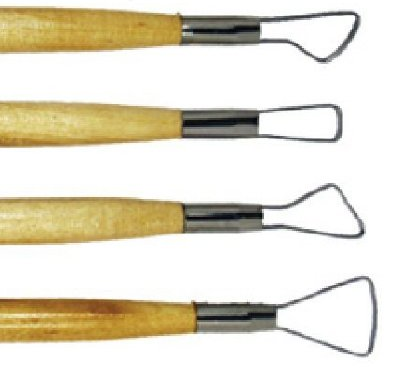
In class we received wax medallions for carving. The wax is surprisingly difficult to carve. I started working with a damaged medallion to hone my carving skills before attempting the final product. Donna says to use the tool as an extension of your hand, but I found myself wishing I had more effective tools - specifically, I was really hankering for a kind of tool that I had used in pottery when I was younger, which I later learned was called a ribbon modeling tool.
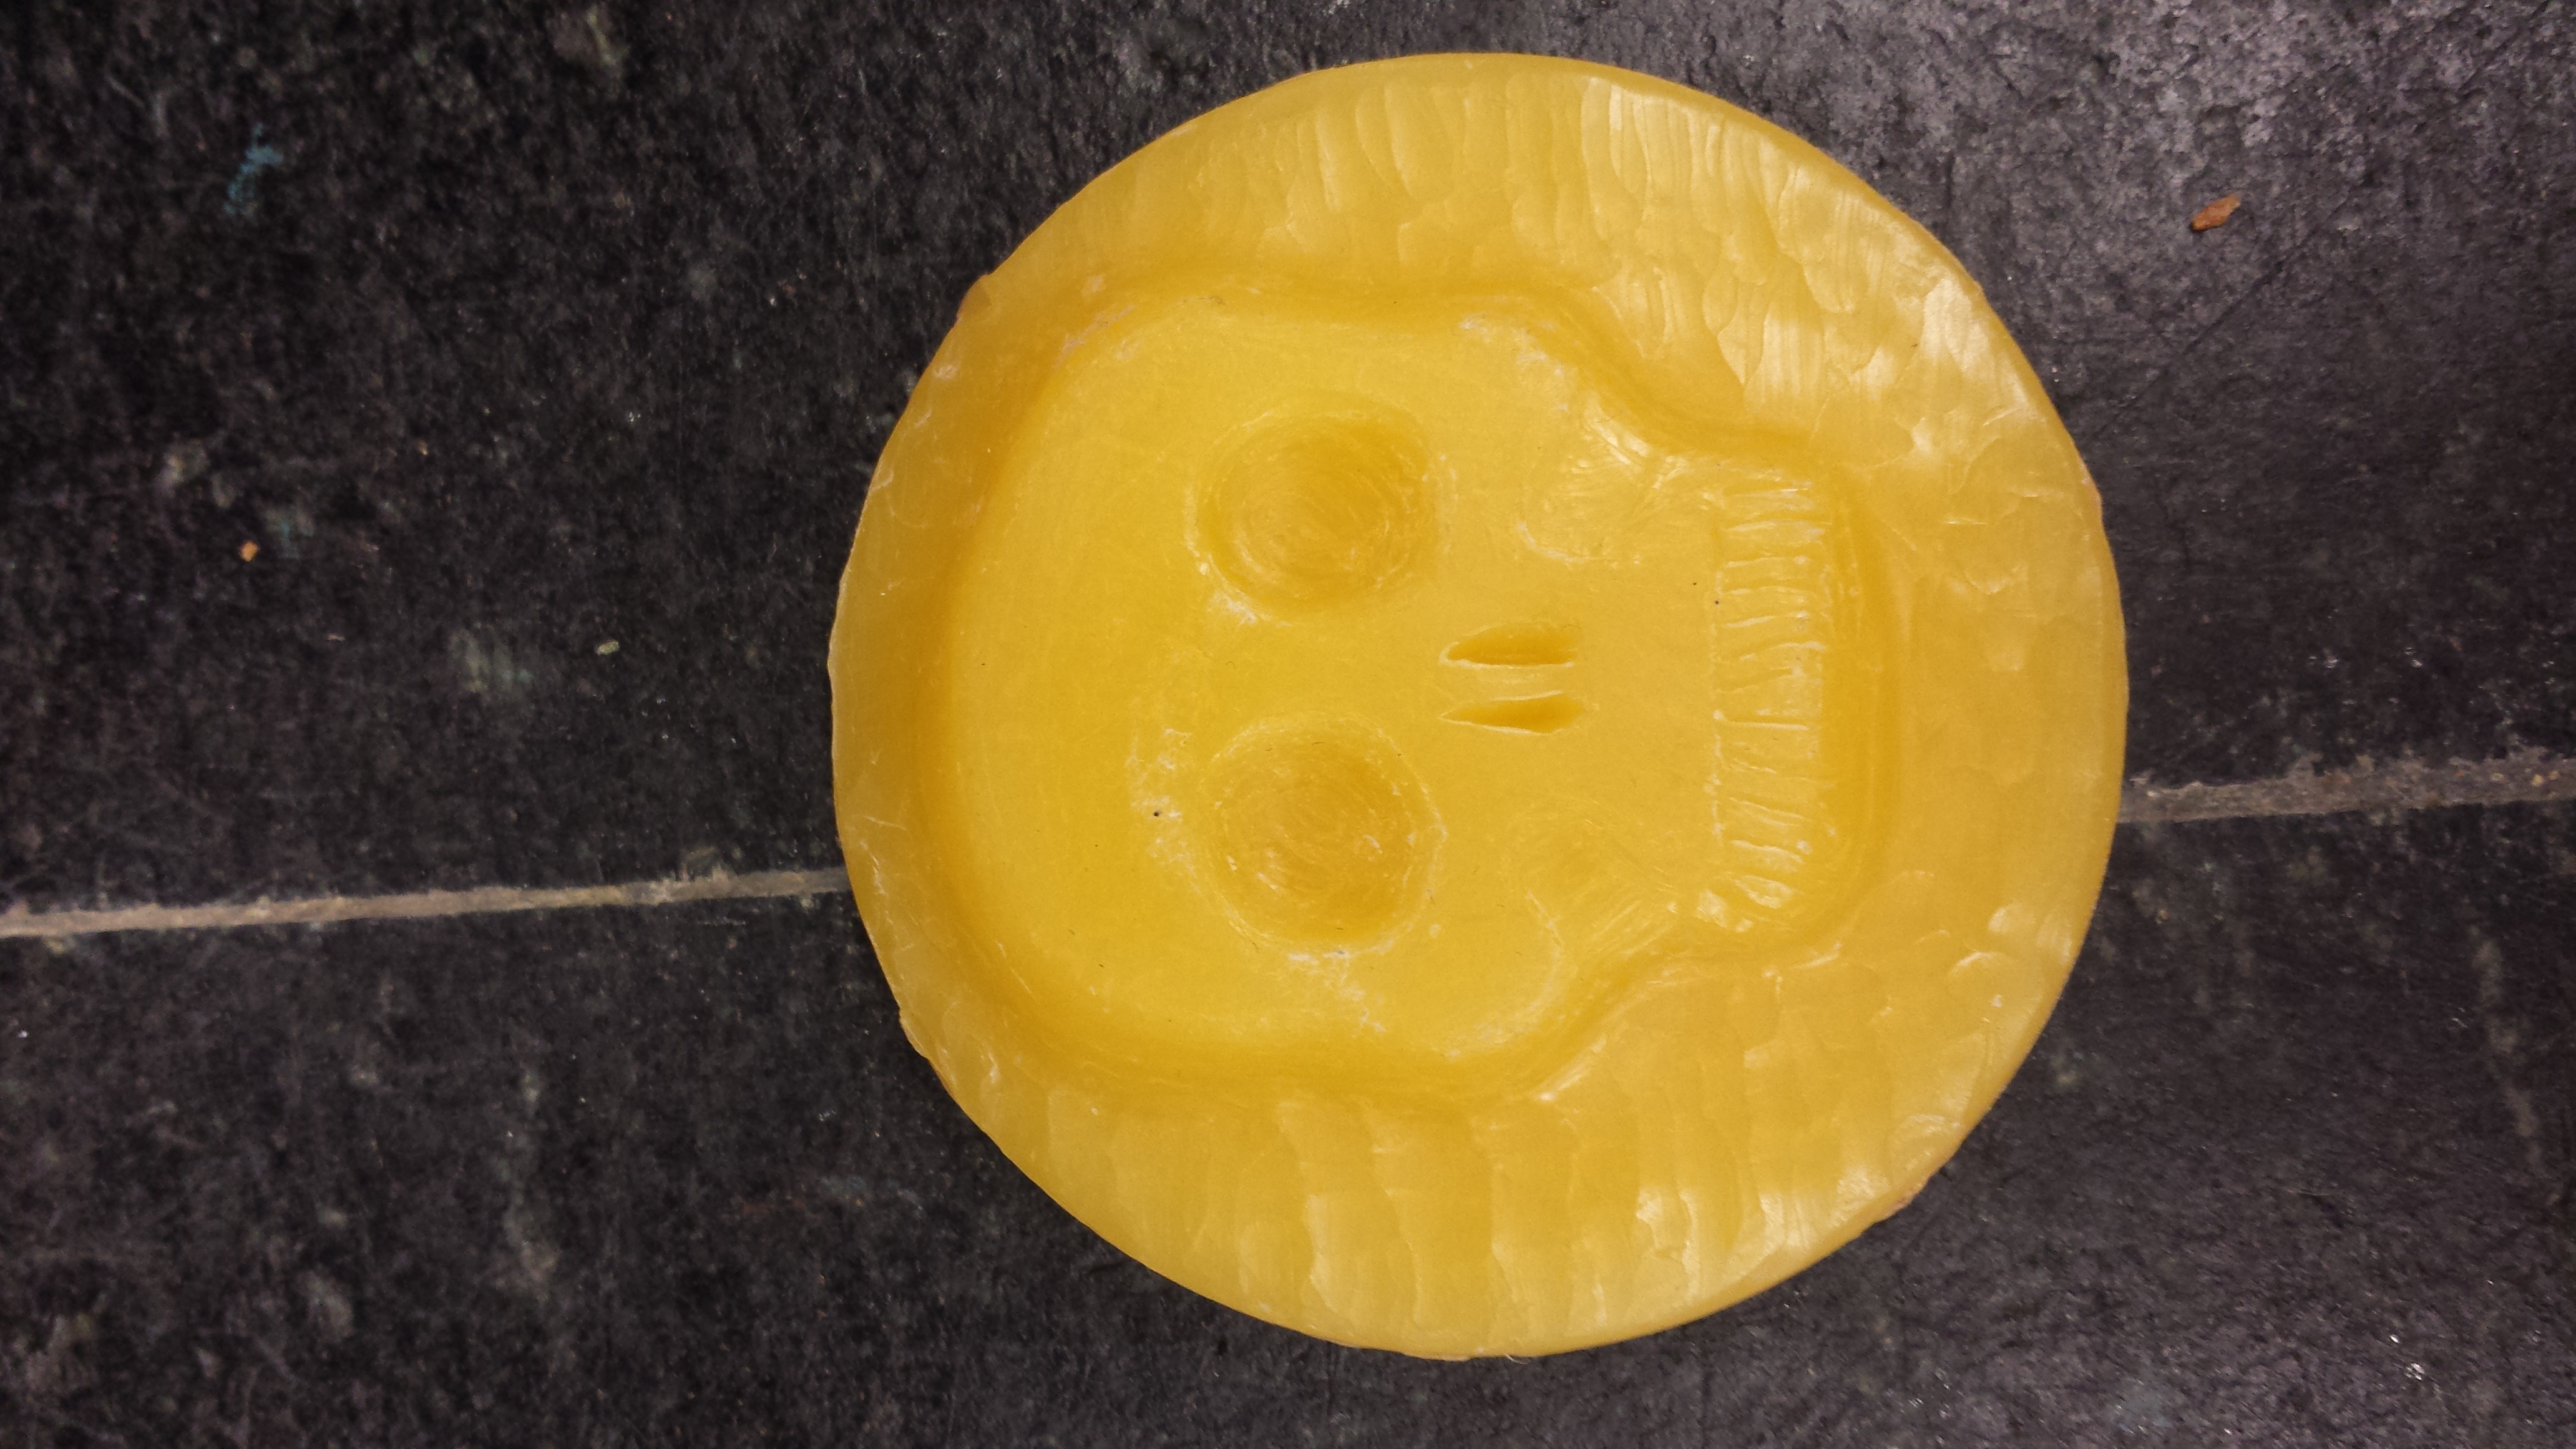
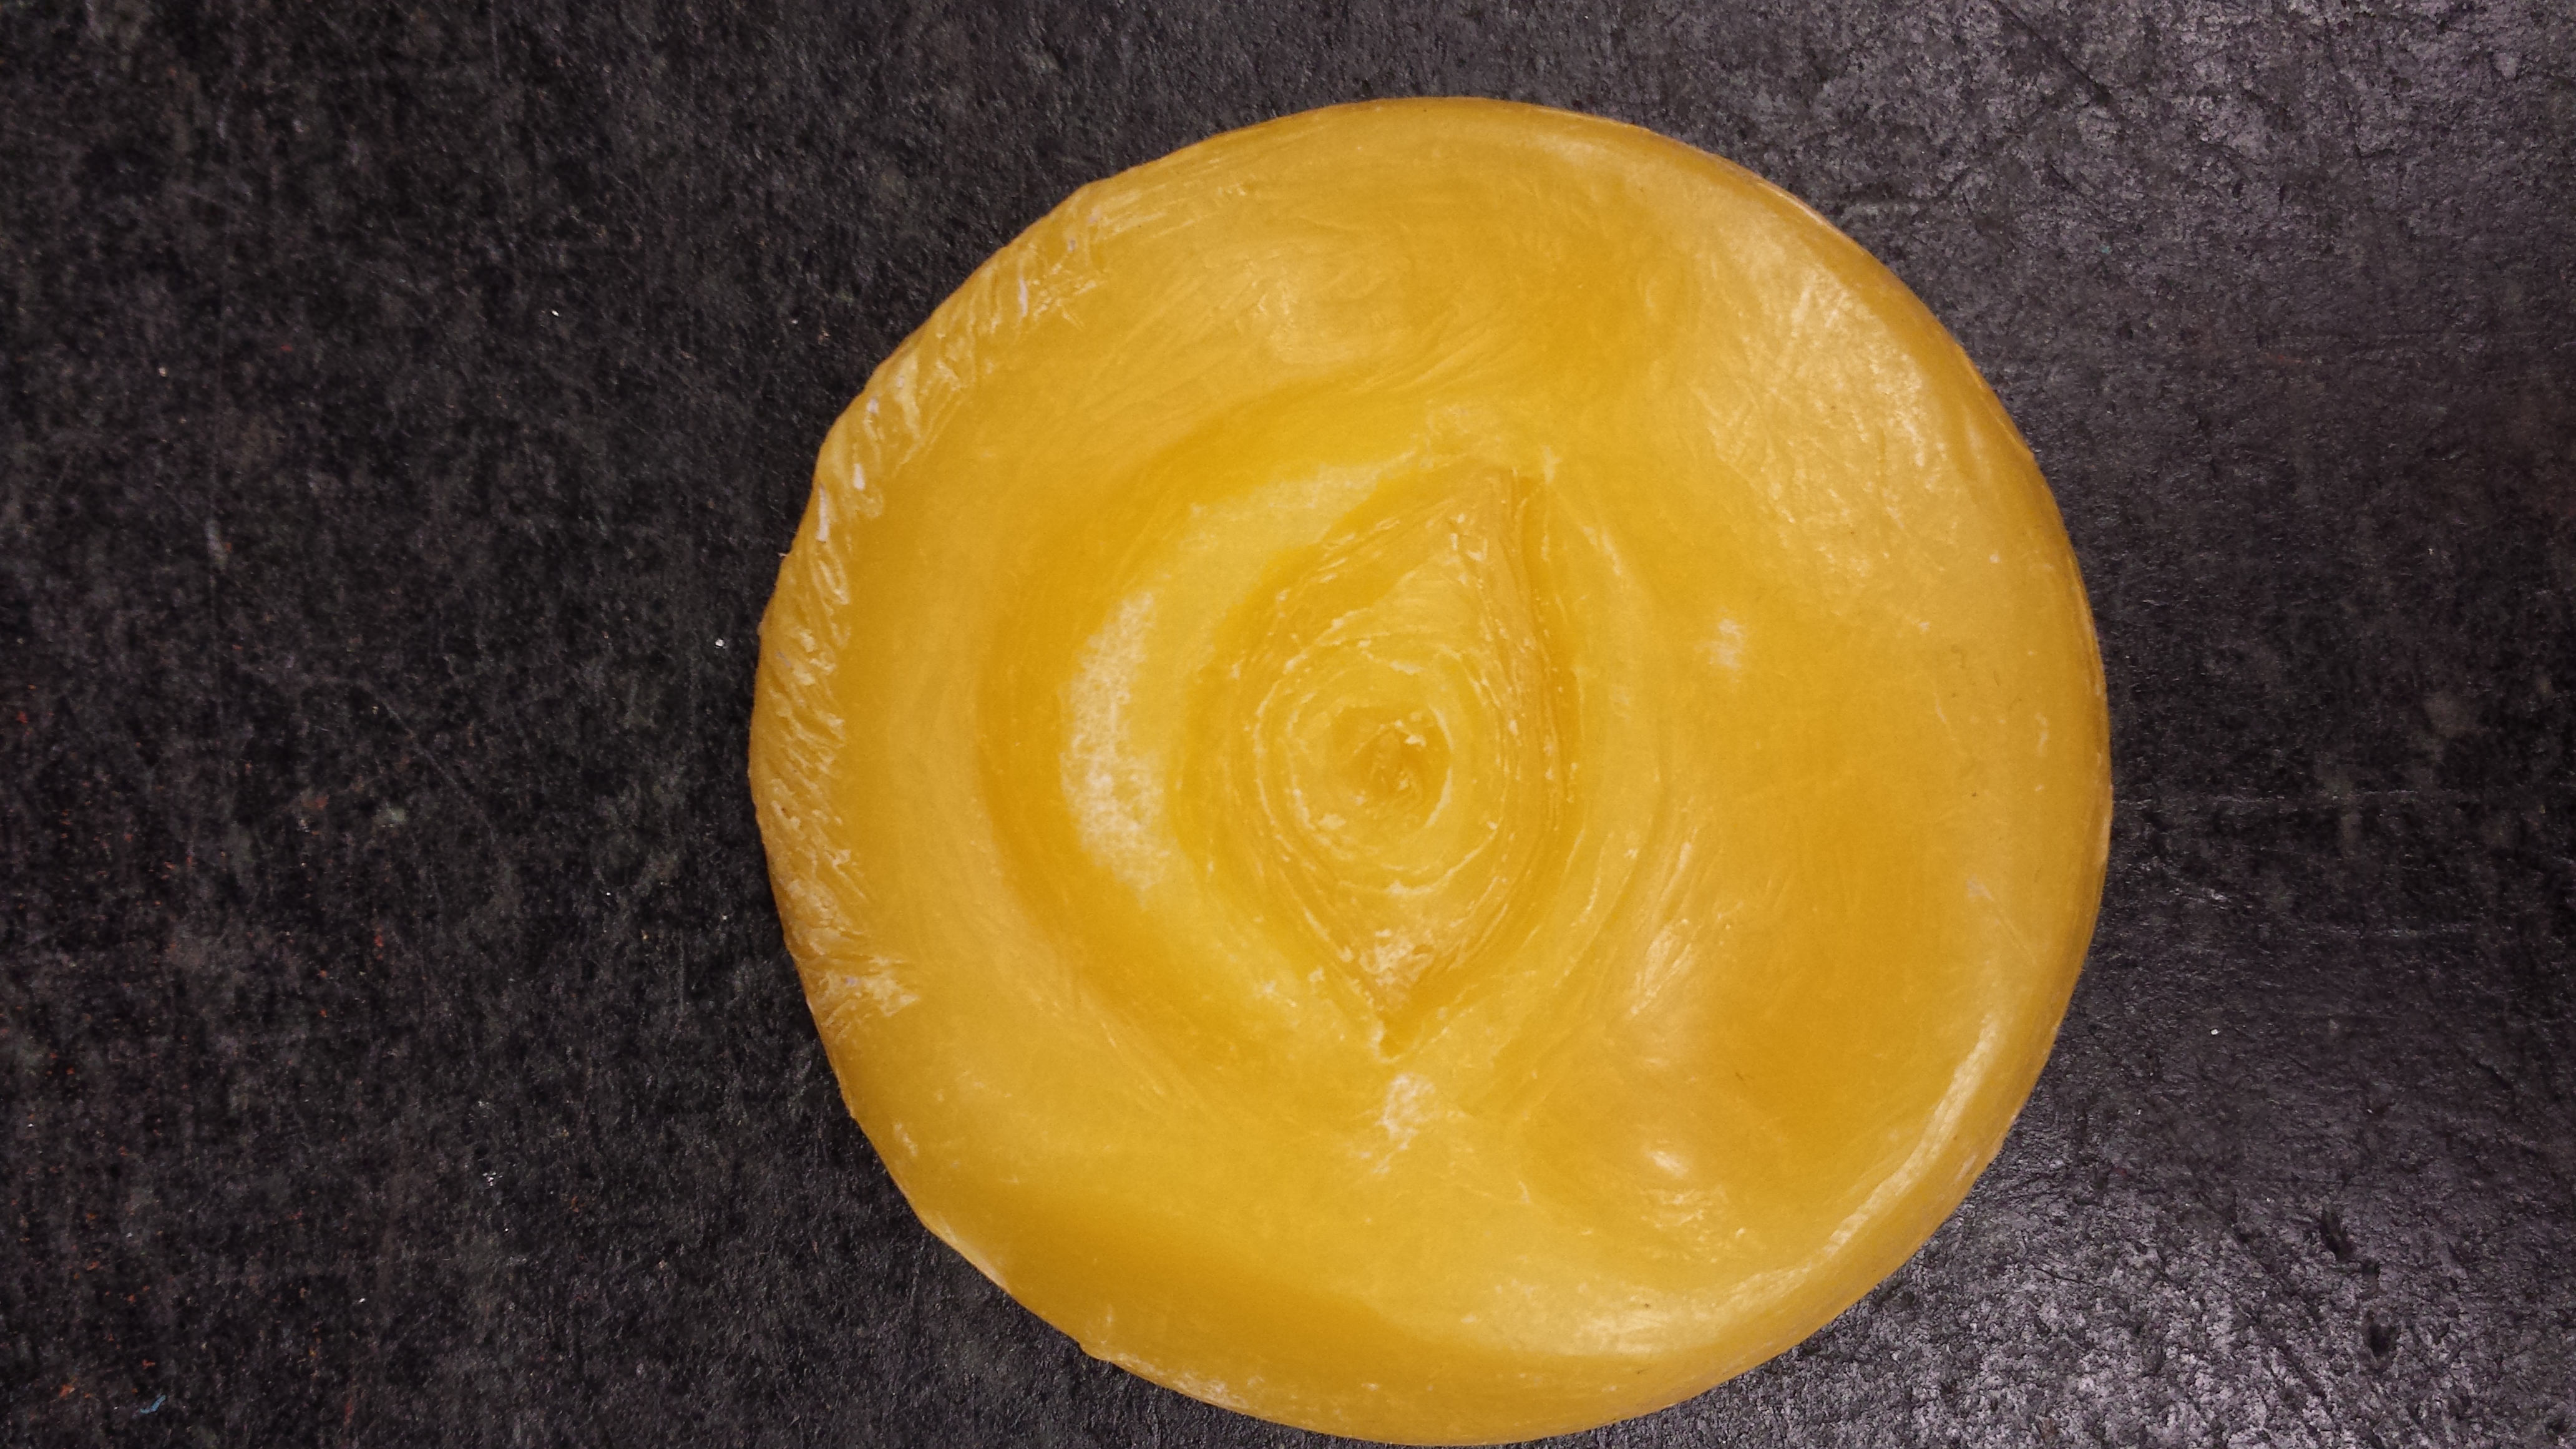
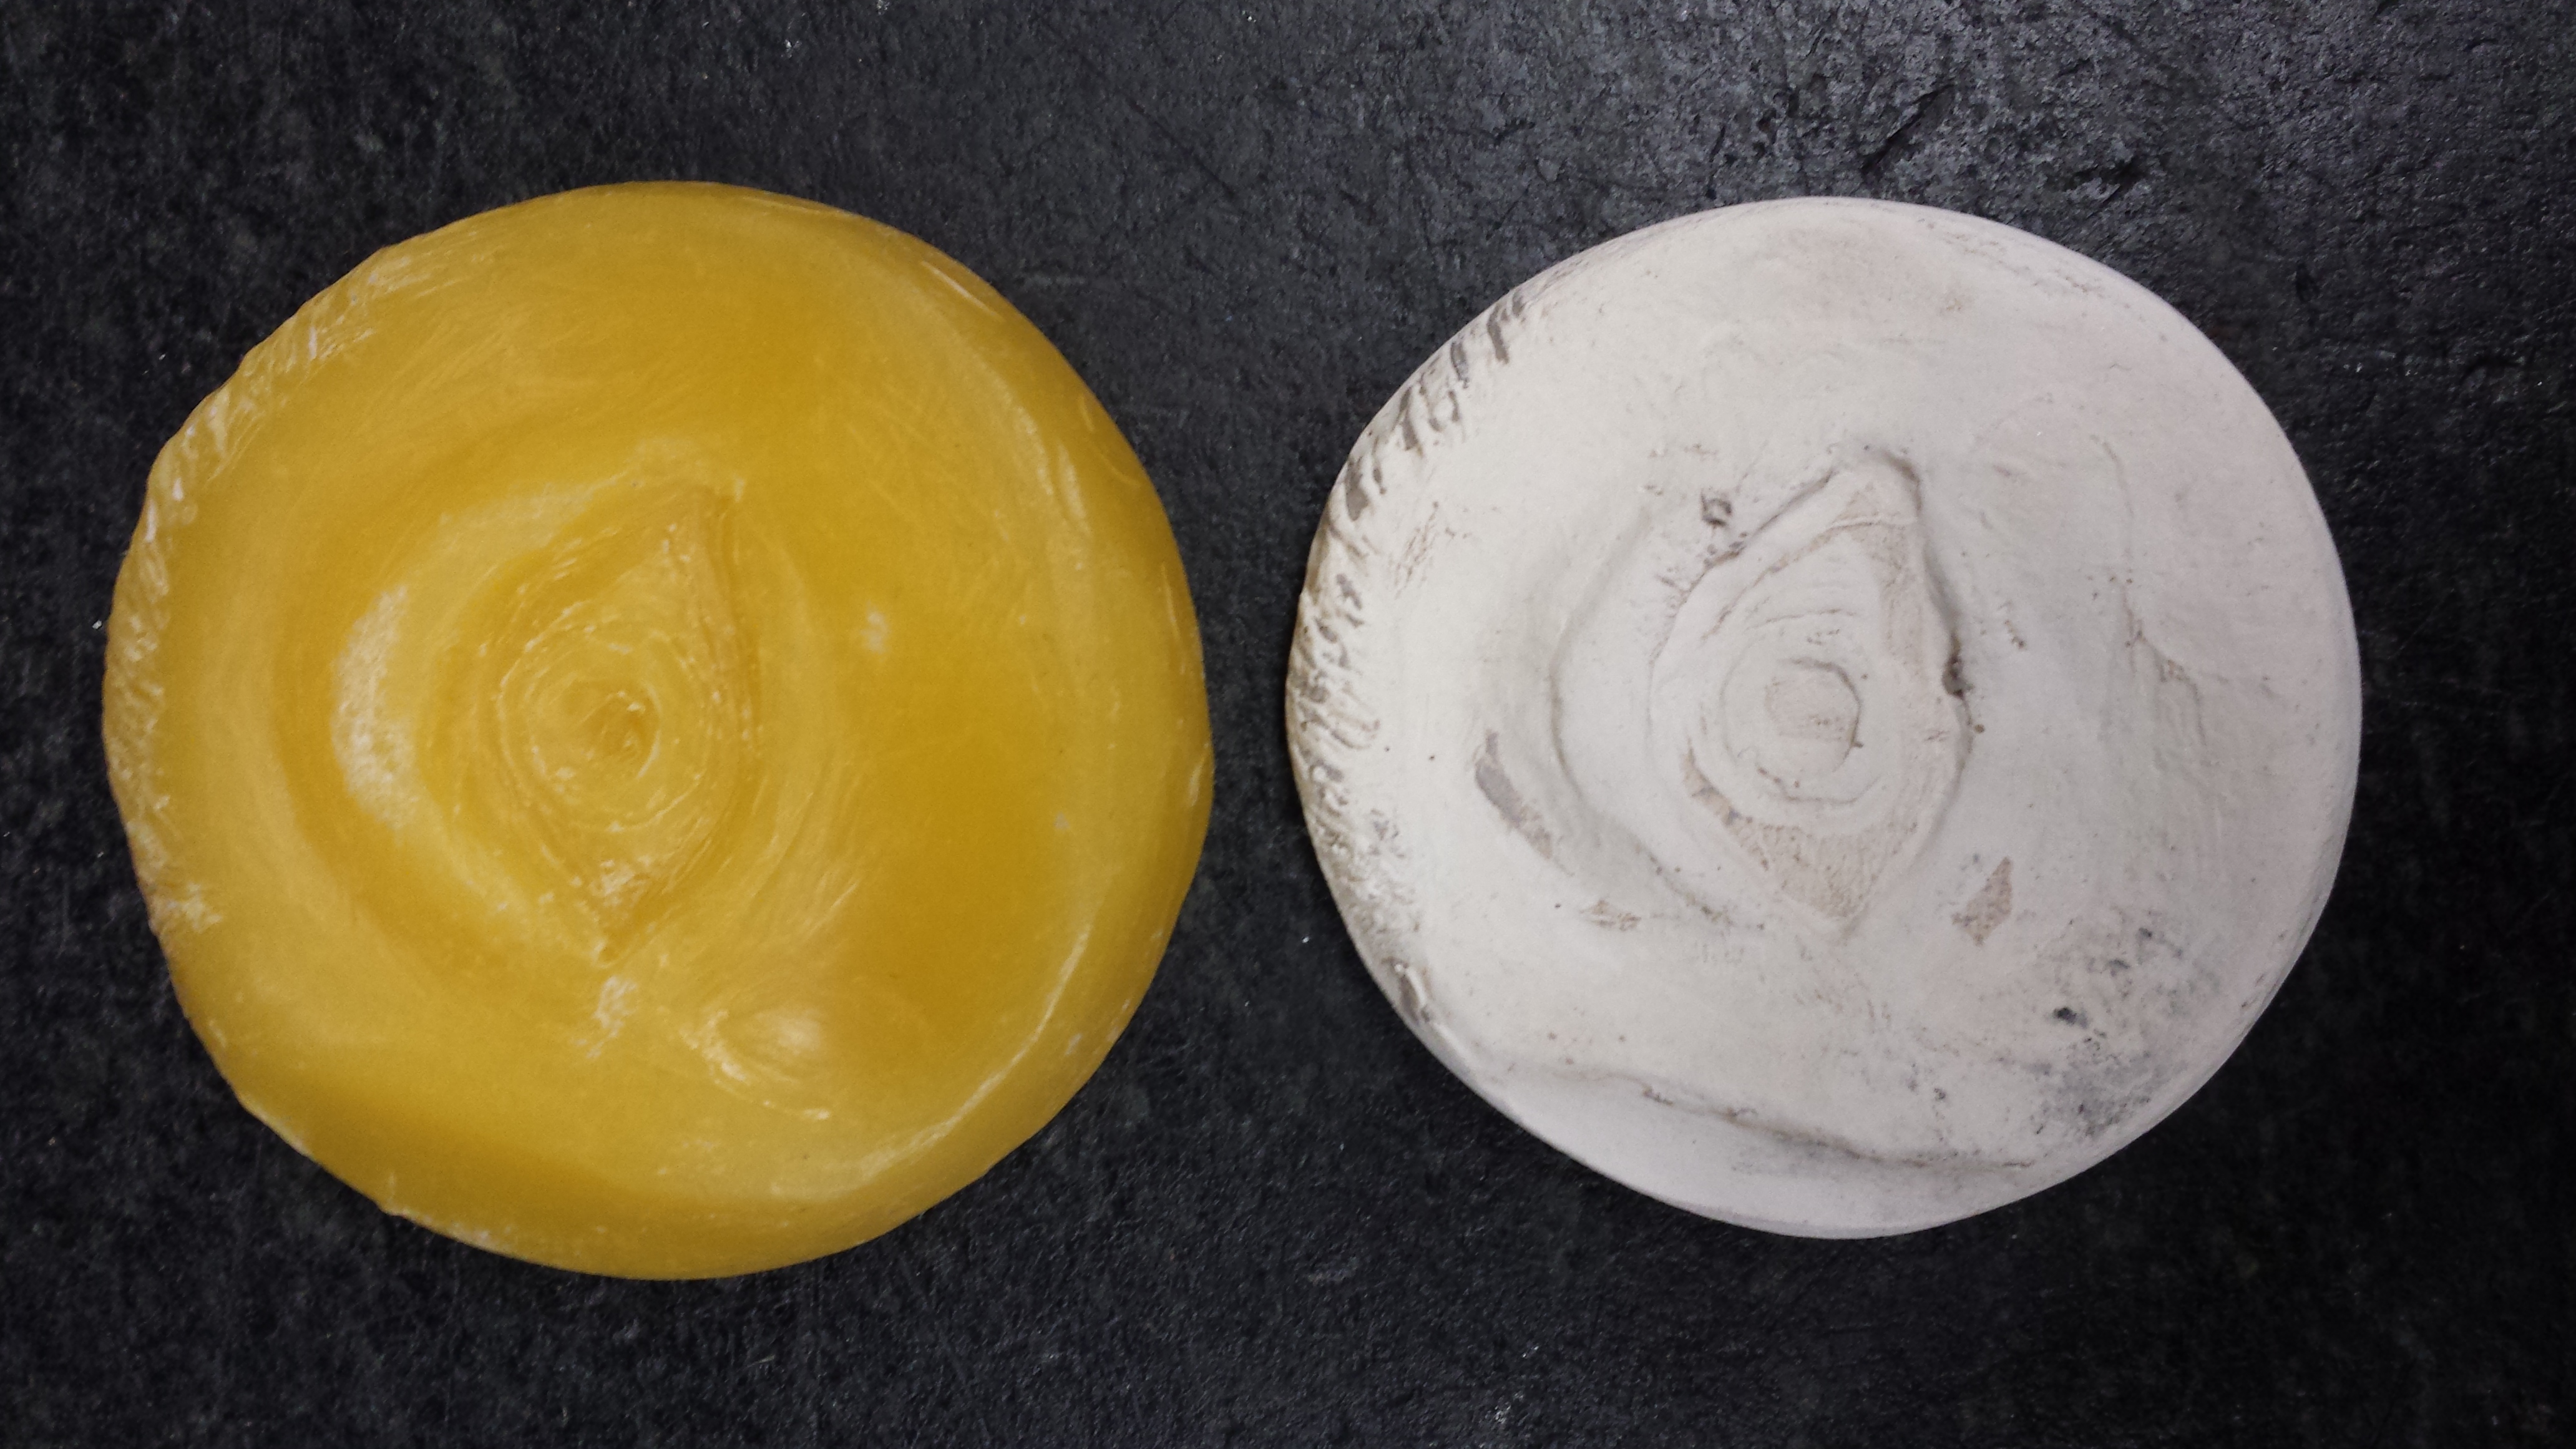
I was glad that I tried my hand out on an extra medallion first because as mentioned in the Glassblowing article, it was definitely a process with a learning curve and I made some mistakes starting out - pushing too hard on the wax, not being able to control my tool, etc. I decided that something evocative of a memento mori would be suitably medieval/early modern and started out trying to carve a skull, but my poor control over the tool ruined the skull shape I thought I was aiming for and I ended up with what looked like part of an eye. So I decided to run with the eye shape and see where it took me. Decided to take the medallion home to see if I can find some more sophisticated tools that will make it easier to get the results I want.
NAME: Emily Boyd
DATE AND TIME: 12pm Friday, 10/3/14
LOCATION: Emily's Midtown Apartment
SUBJECT: Sandcasting - Wax Medallion Carving
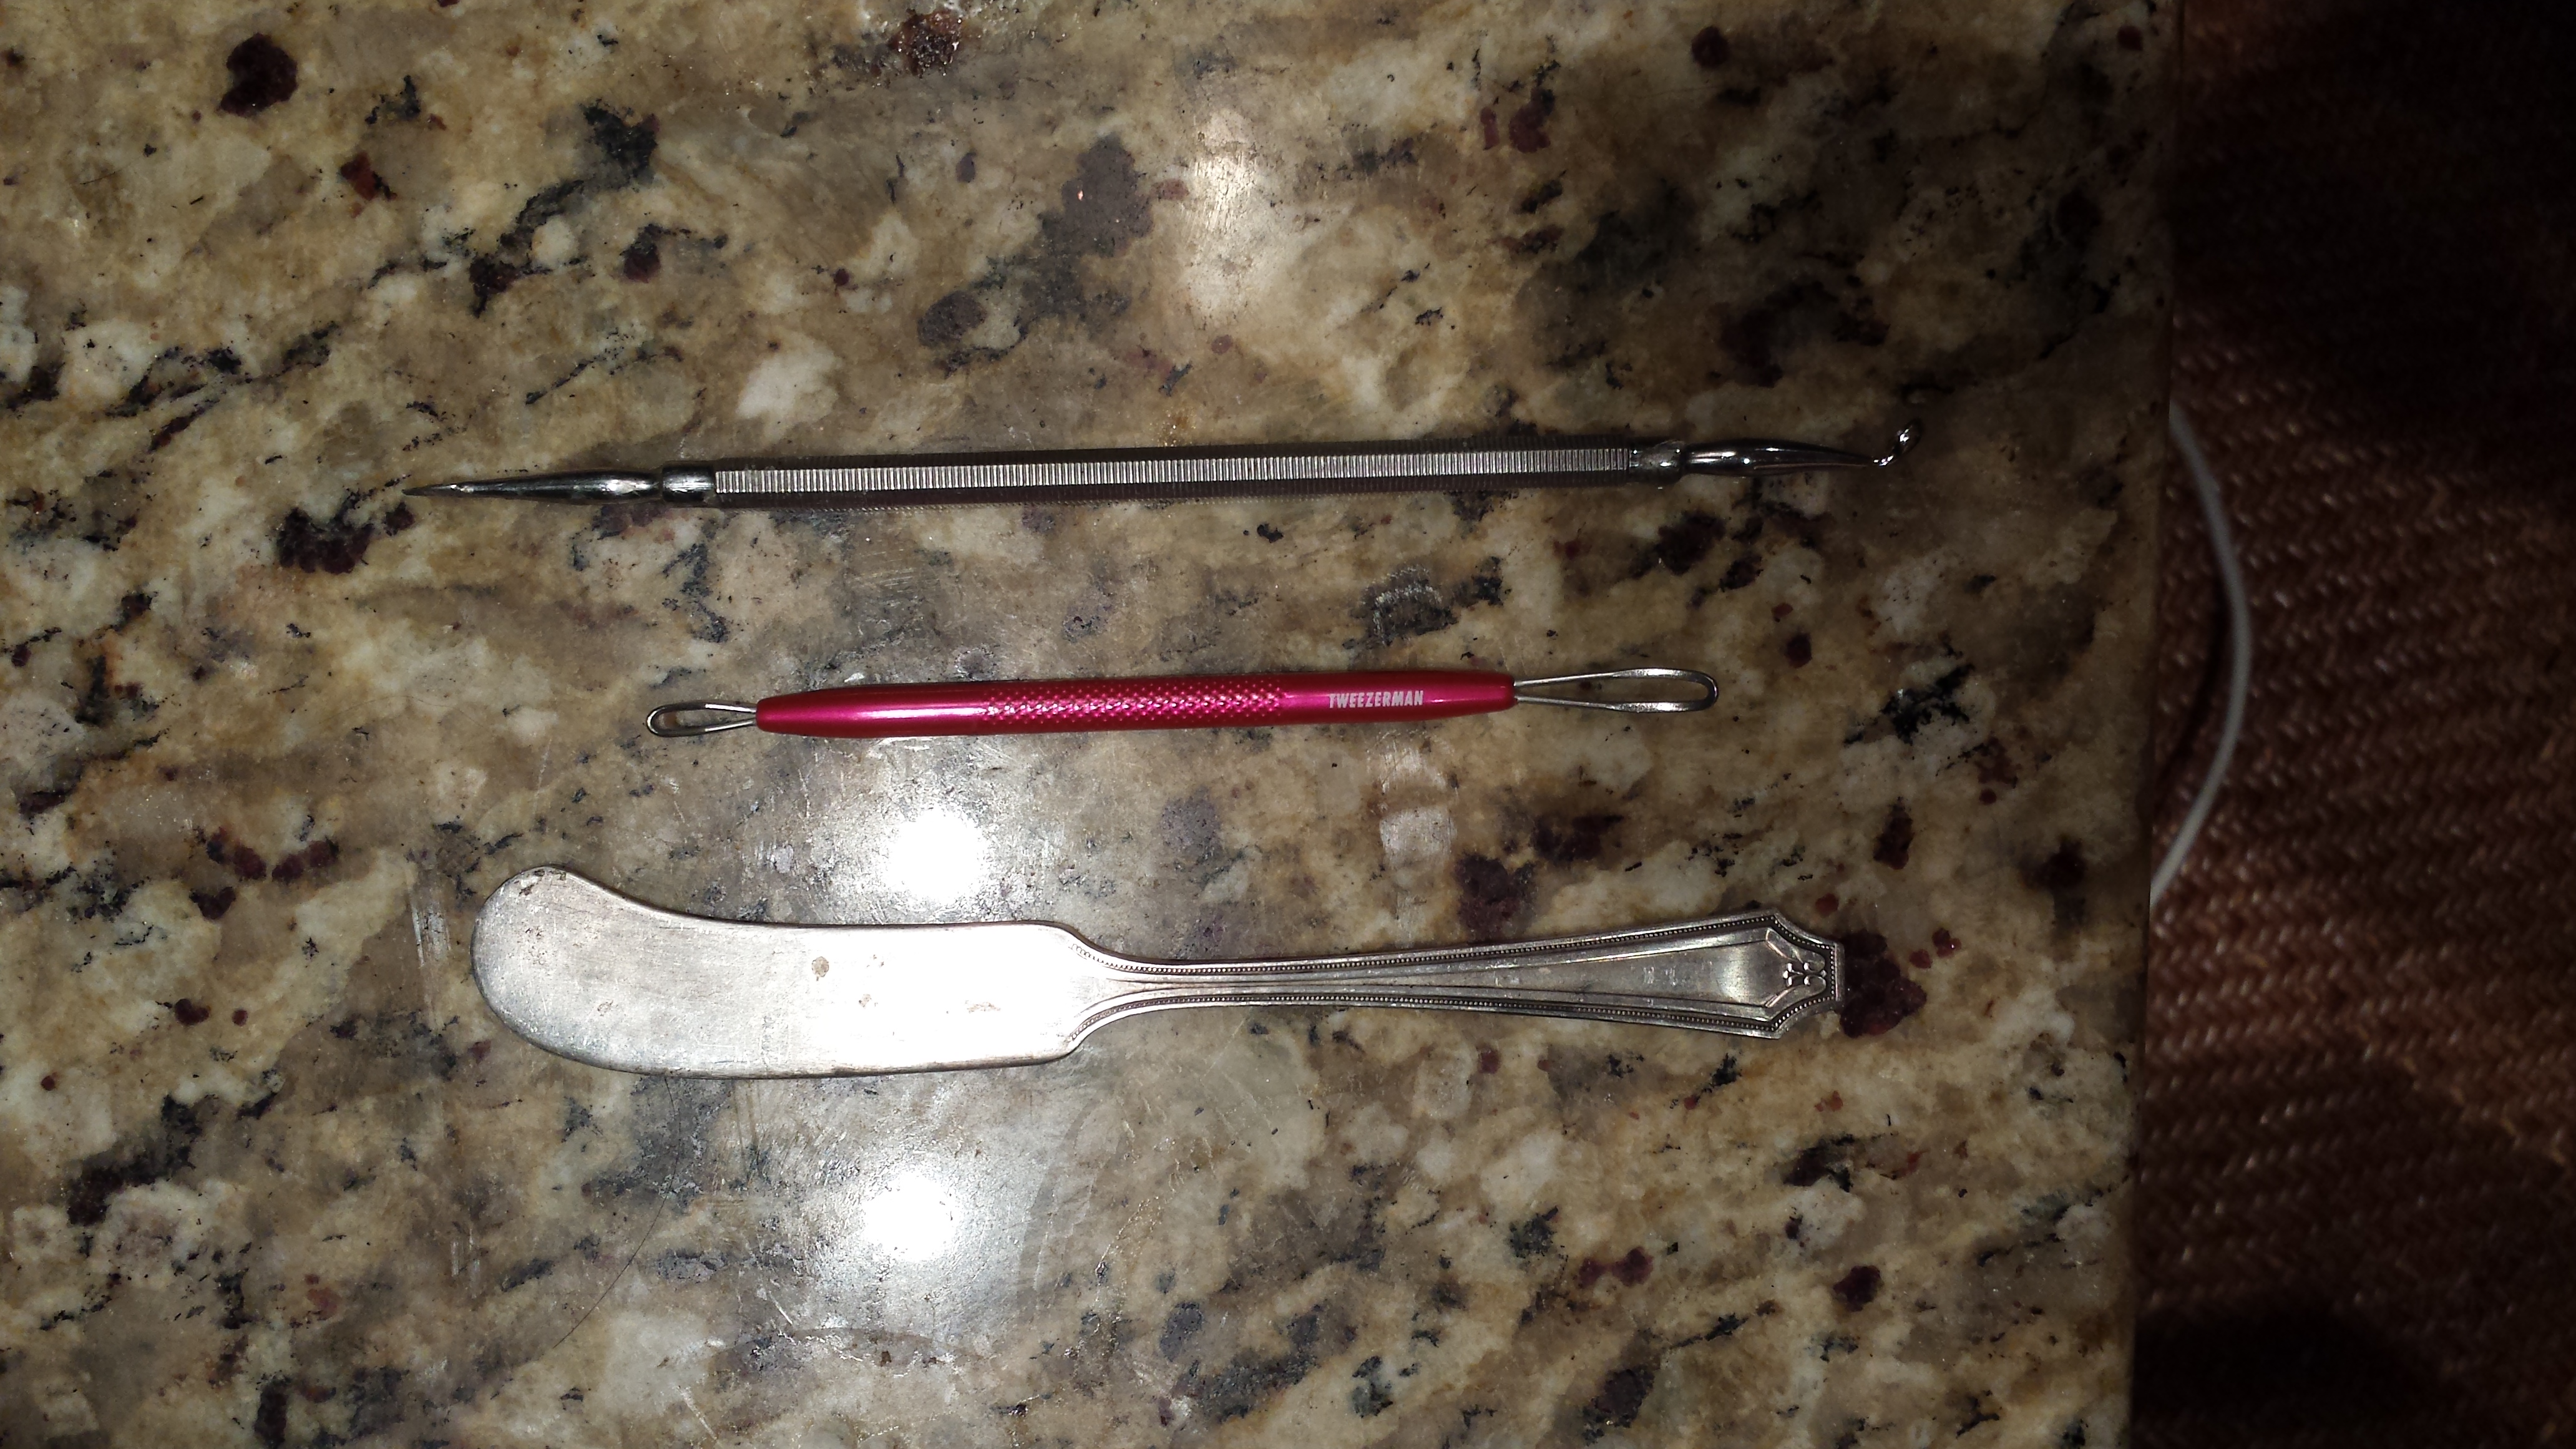
My decision to work at home turned out to be an excellent idea, as in my apartment it is several degrees warmer than the cold chem lab, and it is so much easier to carve the medallion. I begin work on the medallion after I have been home for about 1/2 an hour, and I find there is a noticeable difference, almost right away, in how easy it is to move the tools through the wax. I also have stumbled upon the perfect set of wax carving tools: a sterling butter knife, and two cosmetic blackhead removers, one of which replicates the shape of the ribbon modeling tool I wanted when in the lab. The rounded butter knife is effective for slowly hollowing out larger areas, and the pink blackhead remover in the shape of the modeling tool is effective for detail work in hollowing, and for gouging large chunks deeply as I work on the relief areas of the piece, and the silver blackhead remover has a great point which is effective in thin line work.
I finish the front of the first medallion after about 2 more hours - I am amazed at what slow going it is, peeling back the wax, bit by bit, layer at a time, to get a relief shape that even remotely resembles what I'm trying to create. It will seem I've been working on the same spot for quite some time, and that it's hardly any deeper. I wonder how much of this is due to the fact that suck carving really is slow going, or how much is due to the fact that, working with yellow beeswax in its natural color, it really is harder to see the shape of the carving. I do begin to wish for that vermillion laced wax described in the casting videos - it would be a great help in seeing the results of my work more clearly. Instead of attempting a complicated carving on the back of the medal, as I am unsure if we will be casting both sides, I create an inscription from the Latin Vulgate Bible that goes with the eye shape I've created. I will still attempt another model with a simpler design if I can find the time. I am not sure how well this shape will take, as it is very complicated, and the piece is very thick and will take a lot of metal to cast, if it is replicated exactly.
NAME: Emily Boyd
DATE AND TIME: 10pm Sunday, 10/5/14
LOCATION: Emily's Midtown Apartment
SUBJECT: Sandcasting - Wax Medallion Carving
I have the time this evening to turn back to my medallion carving, so I return to my initial objective of creating a memento mori piece. It's amazing how much faster this piece goes, now that I have the right tools from the start and have become somewhat accustomed to using them. I spend about one hour carving this piece. It is simpler than my original "eye" piece, but also cleaner, and I suspect it may be easier to cast. It's also much thinner and will require less metal, so that may be an asset as well. As with the previous piece, I inscribe the back with a motto, "Vita Brevis, Ars Longa" in keeping with the memento mori theme, and also because I don't know whether we are going to be casting the backs of the pieces.
Some overall observations about working with the wax:
-Carving the wax, especially the second piece, which I trimmed down a lot to be thinner, resulted in a lot of refuse wax. I believe this would have been reused in the original workshop, as the aquamanile video suggested that wax was a precious commodity. However I found it difficult, working at my kitchen counter, to keep track of the little bits, and they kept falling to the floor. It brings to mind the video of the South Indian workshop with the floor washer who comes yearly to help salvage bits of metal lost to the floor.
-The wax was very sticky. It stuck to me, and actually functioned kind of as a hand cream, keeping moisture in my skin. It smelled great, too. Very pleasant to work with. However it was very difficult to keep other things from sticking to the wax. Small particles of dirt and dust, and especially hair from my two cats, kept getting stuck to my medallions, which was frustrating and difficult to remove without damaging my carvings. I wonder how the original artisans would have kept these waxes from getting contaminated by other materials in their workshops.
NAME: Emily Boyd
DATE AND TIME: Class - 9-11am, Tuesday 10/7/14
LOCATION: Chemistry Lab
SUBJECT: Sandcasting - Wax Medallion Carving
Focus on putting a few more touches on my carvings today. I feel they are mostly done, but am glad for the extra time to tinker and get them just right. I focus on creating the appropriately shaped grooves in the writing on the back of my medallions. Donna had mentioned that "v" shaped grooves are best for the next step in the process because they make it easier for the clay to release than a square shaped groove. This takes a surprisingly long time, as the writing is so small, and the lines are intersecting, so each line I draw creates a small piece of refuse wax that wants to just go into the next part of the letter and needs to be carefully removed. As a result I end up working on this for much of the allotted time.
NAME: Emily Boyd
DATE AND TIME: Class - 9-11am, Friday 10/10/14
LOCATION: Chemistry Lab
SUBJECT: Sandcasting - Creating the clay mold and pouring the plaster
Today we made plaster recreations of our wax pieces. I still don't quite understand why it is not possible to just use the wax pieces directly in the clay, and I also am confused about the addition of the plaster step as I don't recall seeing it mentioned anywhere. Maybe I missed something. I am also concerned because I added quite a bit of texture and small details to certain areas of my medallions and I don't know how will it will come out in the final product if we add an additional step to the molding process. If I were attempting this experiment on my own without an expert maker present, I do not think I would have known to do this step, and consequently I don't think I would have done it.
Tony mentions that it's difficult to document this process as parts of it go quite fast, and I think he was quite right. We took some clay - which I can't fully describe where it was made or how (see general observations, below) - an amount big enough to take an impression of our wax piece when flattened out to a thickness of about 1 inch (it got flatter when the wax piece was pressed into it) and molded it into a flat shape such that we could press our wax piece into it to get an impression of the whole piece with a small border around the piece (I left about an inch round the outside, but I suppose you could work with less). We did this on a ceramic dinner plate, so that the clay would not soil the counter, or stick to it. We then used a soft flat brush (some kind of painter's brush from Jef's kit) to brush liquid soap (dish soap) onto the wax to use as a release agent. The layer of soap could be relatively thick, and in fact I found that the more you used, the easier it was to get the wax to come away from the wet clay, although it was never truly particularly easy. We then pressed our wax into our clay blob, and then attempted to remove it without disturbing the impression.
Tony suggested I work with the skull piece instead of the eye piece, as he things the cast will take better. I will try both, and see.
This was not easy. My first attempt with the skull, I used a very very thin layer of the soap, and pressed the piece in very deep (enough so that the clay covered the edges of the top when I pressed in from the sides of the clay blob). This made it very difficult to remove, and, even with Tony's help, we then took the piece out unevenly and it caused half of the impression to be much deeper than the other, and ruined some of the texture of the background. Unfortunately I did not document this process with photographs.
My second attempt, I used even more soap, and I pressed the skull wax in less deeply, although still fairly deep (the clay never covered the edges of the top - rather the whole medallion was flat with the top of the clay). This time I tried from the start to use a tool to pry the medallion from its spot - I ended up creating two deep impressions of the tool connected to the impression of the medallion, although not damaging the texture of the piece or the evenness of the piece so much. I decided to let sleeping dogs lie and not mess around with it too much because it was so much better than the previous time. I could tell that I would also be taking a plaster cast of the marks my tool left, but figured they could be broken or filed off later.
I decided to also take an impression of my eye medallion. Using what I had learned from my previous two experiences, I slathered the medallion with the liquid soap
as both times I had felt more could be used, and Tony was now saying that it would be impossible to use too much. I also used a smaller blob of clay, as my prior mold had had a lot of excess around the impression. I pressed the medallion into the mold quite shallowly - I was trying to go as shallowly as possibly while still taking an impression of the full medallion-face. This medallion was fairly easy to remove from the clay - in part also this was because it was much thicker than the other piece, and consequently it was easy to take a complete impression of the face while still leaving about half of the medallion exposed to aid in the removal process. I used a combination of some light pressure from a prying tool, followed by just my fingers and nails, to remove the medallion. Unfortunately I hadn't pressed quite deeply enough, and because the way I had carved the face of the medallion, there was one part that was much more carved away than the rest, that didn't fully touch the clay. As a result, the impression didn't make the shape of a complete circle. I used a thin metal tool to draw out the border of where that side of the circle should end, and decided it was actually now a very accurate representation of my eye medallion.
Tony came by with plaster which he had already created (which, again, I don't really know much about, see general observations, below), and poured it into my molds. We gently lifted the edge of the plate and tapped it against the table to make any air bubbles in the plaster rise to the top so that they would not ruin the impression (I think? I'm not 100% sure why we did this). We left the plaster to set and dry.
The waxes were easy to clean off, which I did, and I think they would be easy to use again if one desired.
Lastly, I will mention that when I saw Tony trying to clean out the plastic bowl he had mixed the plaster in once it had begun to dry, I was accosted by a sense memory of working with my father in his dental office as I child. I remembered the rubber bowls he had always mixed the plaster for his molds in. That way if it dries in the bowl, the bowl itself is malleable, and can simply be squashed to loosen the dried plaster sticking to its sides, which can then be easily disposed of. I remembered the physical feeling of squeezing the bowl myself. I hadn't thought of that experience in years - it's interesting how physical experiences remain in the body until something sort of jogs them up into the mind. A good argument for the utility of doing making when trying to study making. Once something is in your body, it doesn't ever really go away, and can so strongly inform subsequent related physical processes.

Some general observations about this process:
-Now that we are working with materials sourced by the instructors and used by the whole class, I significantly more confused about the precise details of what is going on and why. When working on my own or with my partner and sourcing my own materials, I have such contact with them and complete control about how, when, where, and why I am acquiring them. It is so much more difficult to explain or defend my actions in these notes because I have big gaps in the experiment that I had no control over and don't fully understand. Where did the clay come from that we used to take these molds? What are the ingredients in the plaster? Are they authentic? Could they have been made more authentic? What concessions had to be made in their sourcing? Would I have made the same concessions? If concessions were made in the parts of the experiment for which I am not responsible, it can completely throw off, or render "unscientific" or inaccurate (in both the historical and the factual senses of the word) my own process and deductions. It is frustrating not to have control over these parts of the experiment because it raises existential questions about the usefulness of what we are doing. Additionally, I feel that working with materials sourced by others without my input (and especially without my understanding) creates a great divide between me as the maker and the materials with which I am striving to "make".
NAME: Emily Boyd
DATE AND TIME: Class - 9:37am, Tuesday 10/14/14
LOCATION: Chemistry Lab - 65 degrees outside this morning
SUBJECT: Sandcasting recipe 118v - Mixing the medium - Shadowing Yijun and Michelle
After sanding down my plasters, I began shadowing Donna as she took notes on Yijun and Michelle making the sand for their molds. I started taking notes when they had just started their mixing process:
Yijun said that she was mixing the ammoniac water with the mold powder by pushing, trying to move the powder to the liquid. As she mixed, the powder got darker, and started to look muddy as more and more water was added. It smelled like dirt or mud.
Tony would habitually reach in and squeeze the “mud”. He said it will be ready when it takes a good impression of the hand without leaving too much residue behind. If you squeeze it and throw it up in the air and catch it, and nothing breaks off or splatters down, it’s ready.
We realized that unfortunately there was no card in the camera! Yijun and Michelle had taken many pictures that were not recorded.
Tony said that it is better to mix with your hand than with a spoon. The spoon creates distance and it’s important to be in contact with your materials.
When the mixture has a consistency like a dough or a paste, they roll it out on the counter with a rolling pin. It’s still sticking to their hands a bit when they grab it, so Tony says it is too wet and needs more powder. The mixture feels cold and surprisingly coarse, especially compared to the delft clay.
I noted that Tony seems to get a little bit frustrated when attempting to add materials in fixed amounts. He prefers to go by feel – taking some in his hand and sprinkling it over the “dough” to try and achieve the right consistency. It’s hard to get him to measure concretely. It seems that a scant ¼ cup of additional powder is sprinkled on top at this stage. The paste quickly changes consistency. More brick dust is added and I see that it quickly soaks up the moisture from the paste and changes color to a darker shade.
Tony says we are seeking a consistency where the dough has no moisture on top.
At this point it is suggested that everyone begin working on their own mixture, and I begin working with Jef.
NAME: Emily Boyd & Jef Palframan
DATE AND TIME: Class - 10:05am, Friday 10/14/14
LOCATION: Chemistry Lab - 65 degrees outside this morning
SUBJECT: Sandcasting - recipe 118v - mixing the medium
Jef considers the recipe and questions the terms. What does ½ a glass mean in terms of Sal Ammoniac water? Is a glass like a cup or is it a different measure.
We are informed to start working with the proportions that Yijun and Michelle already started with – 3½ cups of powder and 1½ cups of ammoniac water with 4 spoons of brandy. We add two spoons of brandy to 1 ½ cups of ammoniac water, however, as that is what the recipe says to add to a ½ glass and we have not established what a glass actually means. Maybe it means 1 ½ cups of water. In any case the recipe clearly states two spoons of brandy.
-I need to refer to Jef’s notes – he was taking notes during this process and I was mixing.
Because I had an obligation in Boston, I had arranged for a train that day, and was unable to stay to see the rest of the sand molding process after a certain point in our notes.
Some observations from working in the Lab setting with other groups at the same time:
-Sharing resources becomes a real issue that informs everyone’s ability to work in a speedy manner. When working in your own home, you have access to all of your tools and ingredients whenever you want them. In the lab, there is a limited number of certain resources (e.g. bowls), and this affects everyone’s ability to work quickly.
-Sharing knowledge can be a blessing and a curse. If another group has gone before you, it is helpful to be able to learn from their mistakes. However, if the knowledge is shared before it is complete, it’s not necessarily helpful. For example, the original proportions of powder and water that we were given were not the proportions of powder and water that the first group ended up with in their final product, which was much drier. However, we were told to start working with their proportions of 3½ to 1½. Perhaps if left to our own devices, we would have discovered our own route to the correct proportions of materials more quickly, or perhaps not. It was certainly helpful to be able to peek at other people’s mixtures once they were successful.
-Watching making can be very, very helpful for making yourself. Having shadowed Yijun and Michelle working with Donna and Tony, I felt very confident when I took on that part of the mixing process myself because I already had an idea of how it was supposed to go. I believe this ties in with the fact that recipes from the EME tend to have measurements like “enough” and “when it is ready” – it’s easy to gauge these terms if you have seen what “enough” looks like, and what the product looks like, “when it is ready” – much harder to gauge if you’ve never seen it before.
-Lastly, I was really very frustrated by having to leave in the middle of the experiment. I did not understand, nor do I think anyone really had a sense of (or conveyed a sense to us of, if they had it), exactly how long the sand-molding part of this experiment would take. In the future I think it would be better if there were two or three days in which the lab would just be open to the students with an instructor present for 4 to 6 hour blocks at a time, and students could come at whatever time was possible for them to complete the experiment all in one go. I think that is what signing up for times working with Tony outside of class was supposed to be for, but not truly understanding the nature of this experiment in advance, or the purpose of the appointment with Tony, Jef and I signed up for a time on Friday, thoroughly unhelpful for the purposes of finishing this experiment. I had arranged to be out of town for the entire time until we left for the Vitali workshop the following Thursday, so it was impossible for me to come back and finish my own mold. I am incredibly grateful to Jef for stepping up to finish my mold for me, but once again, not having control of this part of the experiment left me feeling quite removed from the rest of the casting process. As Tony had said to Yijun and Michelle when they were mixing their sand with a spoon, they were creating distance from their materials and it's important for a maker to be in contact with them. I feel this true even more so, about missing out on a whole section of the experiment, and I also touched on this above with relation to the sourcing of the materials, above. It really did create a distance for me and make it a bit more difficult to wrap my head around exactly what was going on, and also I feel it undercut my ability to make helpful observations about the process.
NAME: Emily Boyd & Jef Palframan
DATE AND TIME: Class - approximately 9:30am-12:30pm, Thursday 10/16/14
LOCATION: Ubaldo Vitali's workshop, New Jersey
SUBJECT: Sandcasting - recipe 118v - Casting in Tin & Silver
Today we travelled to the metal casting workshop of expert maker Ubaldo Vitali.
Notes from Tin Casting:
We began with the tin casting proces. We heated the molds until they were "not very hot to the touch" in order to drive off the moisture. I watched Ubaldo quickly bend the rods of tin (mostly tin with a slight percentage of silver mixed in) with a clamp to be able to easily break them into pieces that would fit in the crucible.
We smoked the molds with a tallow candle before pouring. This was in order to have a carbon layer on the molds to provide release. After attempting with the tallow candle, which was actually surprisingly smokeless (Ubaldo was surprised and chalked it up to the quality of the tallow, which he said may be too refined), a gas torch was used to quickly char the molds with a fine layer of carbon until they are black. Either Tony or Ubaldo said, "This is as fine as you get" - in other words, smoking the mold in this way provides a layer of release agent so thin that it doesn't ruin any of the details that the mold has captured. Thin black filaments of I don't know what - carbonized mold? - float through the air afterwards and give one a feeling of seeing stars. I find this extremely disconcerting and have to step out of the area to clear my head.
The tin has been placed in the crucible to melt for 5-10 minutes before this time, while we smoked the molds. We check the quantity and Tony feels it is not enough - he adds more tin to increase the volume.
The mold which contained Jonah's medal and another came out well - because they pressed their patterns into the clay. The Professor felt this worked well even though the clay was made with grog, and was "at points dry and at points wet" (I'm not sure what that means) which she suspected would take a worse impression. But as we smoked these molds, it seemed they actually took well.
The charcoal being used by the workshop was hardwood charcoal, which takes more oxygen to burn.
Notes from Silver Casting:
The silver casting process was, on the whole, not successful at making great impressions, although quite useful as a learning process.
The molds were still too damp, except for the delft clay. The silver crackled and splattered, and we were unable to finish pouring these pieces.
The commercial clay, however, took very well. The only issue was that the wooden frame caught fire from the molten silver and kept flaming until Ubaldo used a brick to deprive it of oxygen and the flame went out.
We noted that one of the failed molds was totally damp - it was in fact so damp that it left beads of moisture on the floor underneath it when the mold was moved.
Some general observations:
-This process really gave me a lot of respect for the accumulated tolerance of the foundry worker. It was very interesting watching my peers fade and need to sit down while Ubaldo lectured us in the workshop, standing and talking with ease. The lack of oxygen in the air really went to my head and I found myself frequently needing to step outside. The same thing occurred when I was overwhelmed by the floating carbon filaments. Yet these natural aspects of working in a casting workshop did not phase any of the workers there, and most especially Ubaldo. The maker is comfortable in his surroundings because of his tolerance for the physical experiences of the workshop, although for some of us they became quite a hurdle to our focus and concentration.
-Looking back over the manuscript now, I see great emphasis throughout on the hotness and dryness of the molds. I would not necessarily have given this a second thought before our field trip to the foundry, but now that I have seen first hand how important it is to have molds that are dry in order to get any kind of impression at all without dangerous and destructive splattering, and also hot, in order to allow the metal to flow more freely and quickly through the mold, it is much more meaningful to me when I see these references in the manuscript. Having participated once in a faulty casting process, I am now much more attuned to at least some of the possible errors in the process.
-It was incredibly hard due to the lack of space to see everything that was going on, and likewise it was difficult due to the pace of the activities to take detailed notes about what was going on, or even to figure out what it was most important to take notes about. It was almost impossible, for example, to get an accurate account of how much, how long, etc., - in other words, of metrics. Just as in the mixing process when it was difficult to get Tony to pin down a specific amount of water to add to the sand, and sand to add back in to the wet mixture, I noticed neither Tony nor Ubaldo was taking particular care to time or measure anything, both of them working by feel and by sight and by instinct learned through experience, rather than following a precise recipe. I think if I asked either of them to recount exactly what it was we did, we would get an account that sounded a lot like one of the artisan's recipes from our Early Modern manuscript.